Budget: A Few Last Things
Posted On Wednesday, March 19, 2008 at at 3:14 PM by Kosh
Clear Coat Finish, Modeling Putty and Sculpting Tool
At this point there's only a few more things needed to complete the basics of painting and modeling supplies. Really, a couple of these things may not be necessary at this point. The modeling putty and sculpting tool may not be needed until you get some metal models.
Clear Coat Finish
You will really want to put a clear coat on your models if you plan on playing games with them. A clear coat will protect your models and the paint job. Testor's Dullcote and Citadel Matte Varnish are a couple sprays you can use as a clear coat to finish off your models. These two products I mentioned are matte, meaning they won't leave a shiny appearance. If you want a particular part of your model to have a shiny appearance I'd recommend picking up a bottle of gloss varnish and use a brush to apply it to the particular part after you have sprayed it with the matte varnish. Most of the paint producers, Citadel, Vallejo, etc. make a gloss brush on varnish.
I don't have a lot of experience with the two sprays above, but after doing a little reading on these items it seems the Citadel brand Matte Varnish spray isn't that good. I picked up a bottle of Testor's Dullcote for $4. This particular product is no longer available in Europe due to the EU banning a certain chemical that is used in it's production. I've also heard that Krylon makes a good spray varnish and is probably the cheapest. You can find it at most home improvement stores, but I think it's only available in North America.
Modeling Putty and Sculpting Tool
Modeling putty, also called "green stuff," comes as two separate strips of putty, a blue strip and a yellow strip. Once the two are combined the magic begins to work, it turns green and begins to harden. It takes about two hours to completely harden, which means you have two hours to do with it what you want. It's mostly used to fill in gaps on metal models, but you can sculpt a complete model out of the stuff. It's packaged and sold by GW for $8 for a small amount. You can also get about four times the amount GW sells from Gale Force Nine for $18. I bought a package of GF9 putty.
A sculpting tool is used to spread and manipulate the modeling putty. This keeps from leaving fingerprints and helps smooth the putty out. GW sells a tool for $6, GF9 sells a 3 piece tool set for $12, and if you're really into sculpting you can get this nice 12 piece set pretty cheap. I picked up the Citadel tool, because that's all I could find in my area. You can check out this article for tips and tricks using green stuff and a sculpting tool.
Odds and Ends
You may also want to pick up a few more things for your work space such as shelving. I had a local carpenter put together a simple shelf out of some scrap wood he had lying around. It was only $6, but something you could easily do if you have the tools yourself.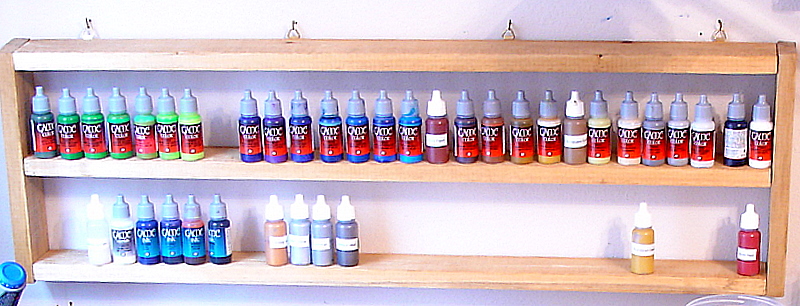
I also bought a couple of flatware trays at a flea market for $5. I had originally intended to store my paint on them, but that was before I decided to go with Vallejo paints, which didn't fit. However, I will use it to put my infantry size models on it for display. I picked up a cheap cork board as well for $10. I put a color wheel, mixing charts, and a Citadel to Vallejo equivalency chart on mine. You could also use it for inspiration by putting pictures from magazines or the internet on there.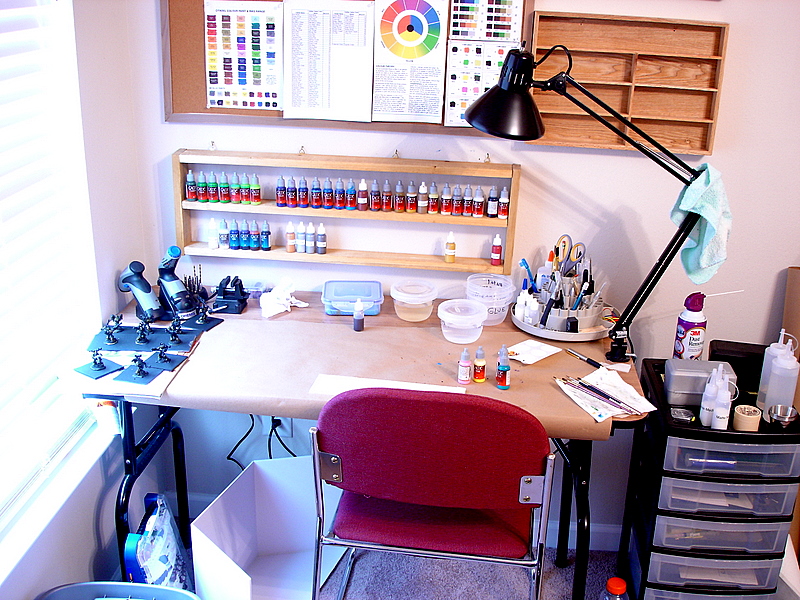
That does it for this budget, it came to $49. That pretty much does it for buying painting and modeling supplies, from here on out you will just need to replenish what you have or maybe pick up a few new colors of paint. There will still be more budgets coming, we still have models to buy as well as gaming accessories.
A Note
As you can see, I changed the name of my blog from Warhammer 40k on a Budget to Wargaming on a Budget. The reason is, I'm branching out. It's going to take me a while to buy all the models to make my 40k army, but I'm itching to play something. I've been checking out another game recently, Warmachine/Hordes by Privateer Press. From what I've seen it's a fun game and pretty cheap to get into. Most games are 500 point games, you can get a battle box of 350 points for only $50 and then build to 500 points for less than $100 total.
I had some credit at a game store I used to frequent and used that to buy a Legion of Everblight Hordes army. The local store is starting up a WM/Hordes league next Tuesday that I hope to get in on. I will try to get some pics up of those models as well as my Chaos Space Marine squad that's about half way done. Until then...
Budget: Paints and Brushes
Posted On Wednesday, March 5, 2008 at at 3:42 PM by KoshThere are a lot of different brands of paints and types of brushes out there. It can get confusing trying decide what to buy. I'll show you where I went to research paints and brushes and what I decided on getting for myself.
Brushes
There are bunch of different brushes out there. You don't necessarily need to worry about brand as much as you need to worry about what the bristles are made from. There's synthetic, camel hair, synthetic blend, squirrel, red sable, Kolinsky sable... it can be daunting. Here's a very good article that explains all the differences. The first thing you should do is not worry about any synthetic bristles. Some type of natural hair is usually better, with Kolinsky sable being the best. Kolinsky sable brushes are expensive though, about $10-$20 a brush. It's not that bad when compared to $8 for the GW brushes. Here's a few reasons why a Kolinsky sable brush is the best, this was taken from an article on the B&C written by Starks333.
-natural hairs keep their tips
-natural hair means they can hold moisture and oils better than synthetics which improves flow of paint
-natural kolinsky hairs are softer and less coarse, which means the paint comes off the brush smoother, less likely to streak
-good "snap" means the brush is less likely to fish hook from repeated strokes, or bend out of shape, it also means your strokes are smoother, less rigid(it slides along the piece instead of jumping around)
Yes, I was a skeptic at first, too. I went down to the local art store and took a look at them. They had two brands of Kolinsky sable brushes, Winsor & Newton and Raphaël. The W&N brushes were pretty splayed, so I took a look at the Raphaël brushes, specifically the 8408 Extra Pointed series. Let me tell you, I was surprised. Even I could tell that these were some nice brushes, they had a very nice point and they snapped right back into place after running the brush over the back of my hand. I was sold, the good news was they were 40% off. I bought a size 0 and a 1 for $22. You can also order these from www.dickblick.com. Sizes 0 and 1 should be good enough for now.
From the research I've done, if you take good care of these brushes they should last and hold their points at least a good 4-6 months. In the long run, they may be cheaper than buying $3-$5 cheap brushes every few weeks. I also picked up some brush soap for $5. Here's a good article on taking care of your brushes.
Paints
Citadel, Coat D'Arms, Vallejo, Privateer Press P3, and Reaper are some of the more popular brands of acrylic paints used for models. There are enamel paints out there for models as well, but a majority of people use acrylic paint. Acrylics can be thinned with water and you don't need a special type of thinner like you do with enamel. This site here has some reviews on some of the different brands I mentioned above.
My only experience is with the Citadel range of paints. These come in small pots with a pop top lid. I used them when they had a screw on lid several years ago. The Citadel paints I had dried out very quickly and this seems to be the main complaint about them still today. This was the main reason why I decided not to go with these paints... well, not completely. They do have some of the best metallic paints out there when compared to the others. So, for metallics this is what I decided to go with.
After doing some research, I decided to go with Vallejo Game Color paints for my colored paint. Their range matches Citadel only with different names, you can find a conversion chart here. The main reason I decided on Vallejo was the dropper bottles they come in, these bottles will let you measure your paint by drops when mixing. This makes it easier to keep color formulas when you mix your paints. The other thing I was hearing, was that they don't dry out nearly as fast as the Citadel range. Some folks even said they could last a couple of years in the bottle.
Before you actually buy the paint, you need to figure out what colors you'll be needing. I would suggest you get some neutral colors like black, white, gray, and brown. Maybe a couple shades of the gray and brown. As for main colors, I'd get 2-3 shades of those for highlighting, blending, and shading. I ended up getting 20 bottles of Vallejo for $59 and 5 bottles of Citadel metallics for $18.
One Last Thing
Since I went with the Vallejo dropper bottles, that means I'm going to need a palette since I can't just dip the brush into the paint pot. You can get a cheap small plastic palette for $1 at a hobby store. However, there is something better that will only cost you a few bucks more to make, a Wet Palette. Wet palettes are easy to make and they will make your paint last longer while on the palette, even up to weeks with the lid on. Here is a very good tutorial on making a wet palette. I found all the materials to make one at Wal-mart for $5. By the way, you definitely want to use Parchment paper and not wax paper for your wet palette.
In all, this weeks total was $109. I went over the $100 budget, but remember I brought over $20 from the last budget. It's a good thing I did, I kind of figured this week would be close. See you soon with information on primers and some pics of a few models I primed.
Fun With Magnets
Posted On Saturday, March 1, 2008 at at 6:08 PM by Kosh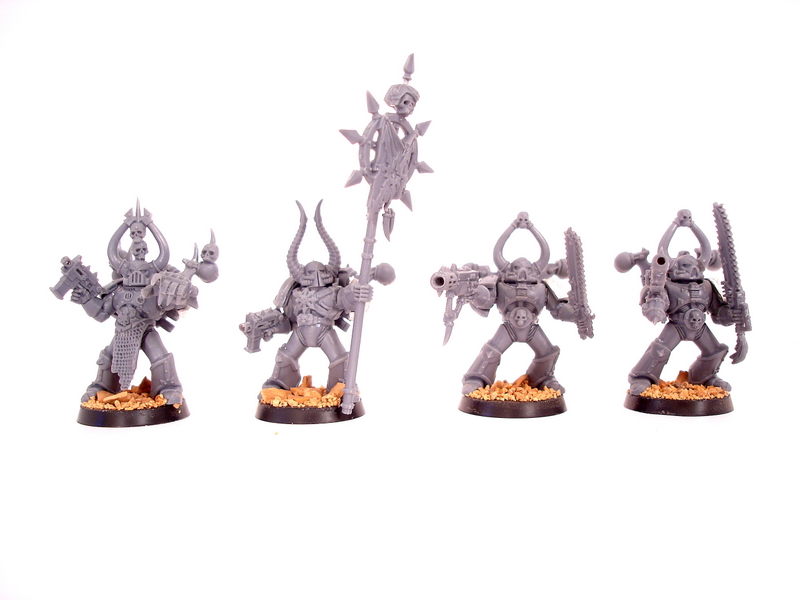
Why Magnetize?
In the long run magnetizing your models could save you money and a lot of trouble. For instance, with a 10 man Chaos Marine Squad you can change the options on four of your marines. You can have an Icon Bearer, an Aspiring Champion, and up to two marines can have different weapons. My squad currently has an Aspiring Champion with a power fist, an Icon Bearer with the Icon of Chaos Glory, a marine with a Flamer, and a marine with a Meltagun. Let's say after playtesting with this squad I want to change the Icon to a Slaanesh Icon and change the champion's power fist to a power weapon. If I had glued them on this would be difficult, yes possible, but with magnets very simple.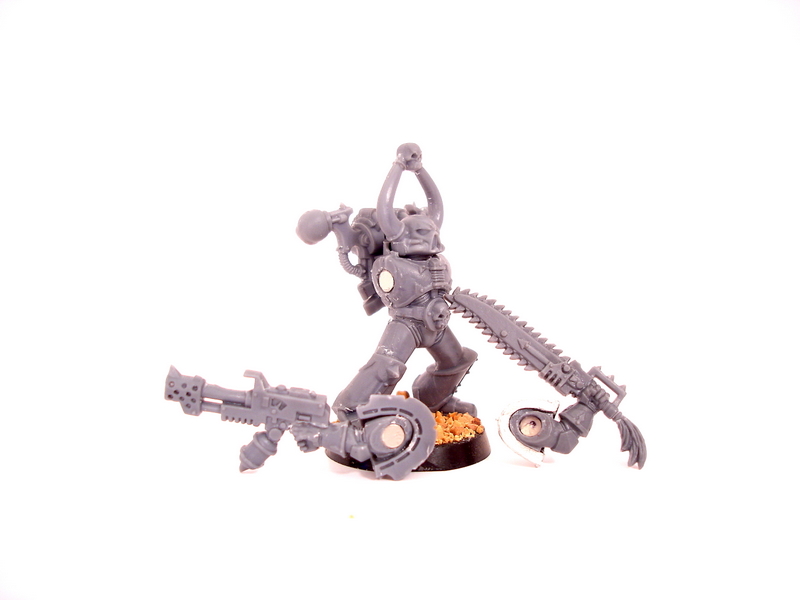
How to Magnetize?
First of all, check out this tutorial by Hyun over at Wee Toy Soldiers. Hyun is the man, I've learned so much from his blog in such a short time. This does take some special equipment such as a dremel. The type Hyun uses, a MiniMite are very inexpensive. I use a Dremel Stylus myself that I bought a while back, they run about $60. Of course, you'll also need magnets. I bought my magnets from Amazing Magnets. You can get 100 1/16" and 100 1/8" for $12.50 + shipping, that's a lot of magnets that should last a while.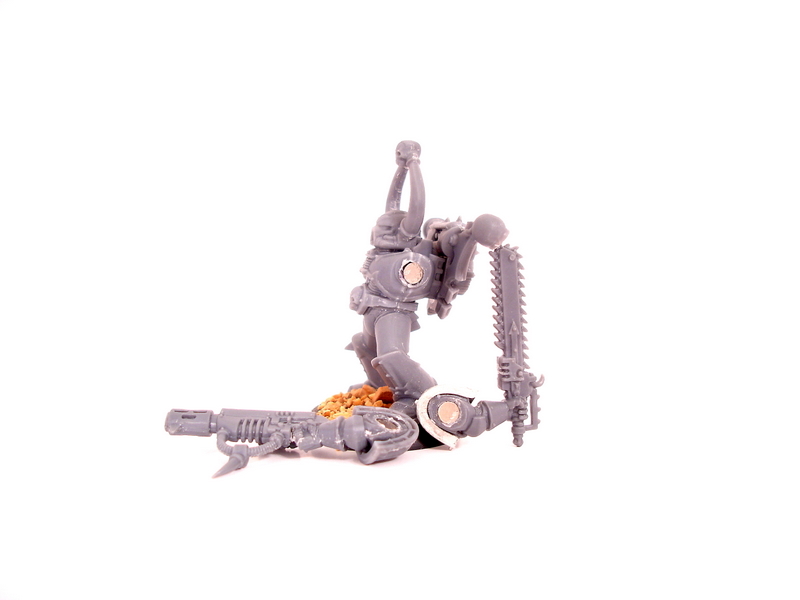
A few things to remember. Mark the poles on your magnets. You don't want to try and put the wrong poles together after you've already super glued the magnets. I used a permanent marker to mark two magnets that were stuck together. This tells you that the marked side goes down into the hole you drilled. Another thing, don't magnetize every available optional weapon right away. Just do whatever you need for your army right now. If you decide to go back and change something, say a Flamer to a Plasma Gun, magnetize the plasma gun then. This way, you know which model you're going to put it on and you can put a magnet on the existing shoulder socket magnet to get your poles correct. One last thing, don't worry if you drill in too far (just don't drill all the way through) and your magnet isn't flush. You can stick some green stuff down in there or just go with it if it's not too bad, the magnet should still be strong enough to hold. It takes a few tries to get the depth correct.
That's about it. Don't get discouraged, a couple of people told me not to worry about magnetizing because I'm new to the hobby and may not be ready for it yet. You can read about doing things and watch tutorials until your blue in the face, but you're not going to really learn anything until you try to do it yourself. Remember, "What we have to learn to do, we learn by doing." - Aristotle.


